


2026 marks a time of profound change in the personal computer industry. Technology is advancing rapidly, and yesterday’s flagship processor can cause a modern game or a complex neural network to become unstable today. For many users in Moscow and other regions, a processor upgrade remains the most effective way to breathe life into an old PC without buying a new system. However, replacing a processor requires a thorough understanding of the architecture, as incompatibility can have dire consequences for the entire hardware.
When does a processor upgrade make sense in 2026?
The decision to improve a system should be based on calculations, not emotions.
The main question: will the new central processing unit provide a noticeable boost? If your current platform is still relevant, replacing just one chip will save you money. In 2026, processors began to consume more power, and upgrading an older system to a more advanced CPU often requires a comprehensive approach to assessing the motherboard’s capabilities .
Signs that the CPU has become a bottleneck
The main sign that it’s time to replace your processor is when the graphics card ( GPU ) isn’t 100% loaded, but the processor is already working at its limits. This is a classic bottleneck , when a “small” computing unit slows down the entire process. If you see increased task execution times in Cinebench or during rendering, and the system logic is starting to lag, it’s time to upgrade your CPU. It should have enough power to ensure a smooth frame rate and fast data processing.
Upgrade your processor or change your platform
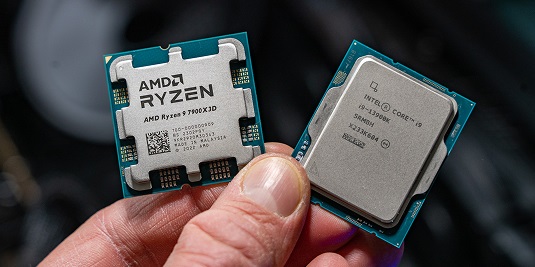
Sometimes an upgrade isn’t practical. If your socket is hopelessly outdated, buying a new chip for the old socket won’t yield the desired effect. In 2026, the boundaries between Intel and AMD generations will become even clearer. If your motherboard only supports DDR4 , and new CPUs are designed for DDR5 , a complete platform upgrade would be a more sensible choice. Before buying a new component, consider how long the current base component will last.
What to check before replacing the processor
A safe upgrade begins with analyzing your current hardware. You must understand your motherboard’s capabilities precisely to avoid purchasing an incompatible product. Users often make the mistake of relying solely on the socket name, forgetting about the chipset’s electrical parameters and logic .
- Motherboard model: You can find it out using CPU-Z or by looking inside the case.
- BIOS version: Old microcode may simply not “see” the new processor.
- PSU Capacity: Make sure the power supply can handle the increased power consumption.
- Cooling system: An old cooler may not be able to cope with the increased TDP.
- Space Requirements: New cooling systems may require more space.
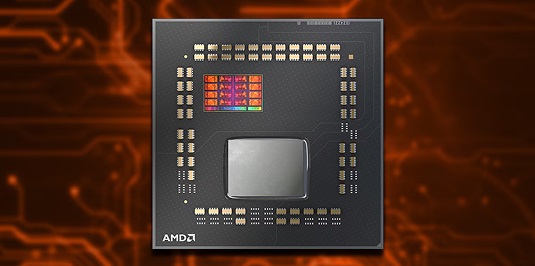
Socket and processor generation
A socket is a physical interface. For example, LGA 1851 or AM5 . However, physical compatibility does not guarantee logical compatibility. Even if a processor fits the socket, the motherboard may not support it due to architectural limitations. In 2026, it’s important to check the generation of a new chip and whether your specific motherboard supports it.
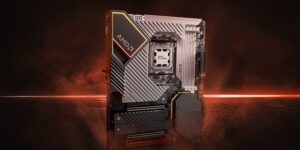
Motherboard chipset
The chipset is the “brain” of the board. It determines which technologies are available. For example, budget chipsets may not support overclocking or have a limited number of PCIe lanes . When choosing a new processor, make sure the chipset can unleash its full potential. Sometimes, manufacturers add support for new CPUs selectively, only for higher-end motherboard lines.
Memory and Standards Support
In 2026, memory speed has become a critical factor for neural network and gaming performance. If your processor supports higher RAM frequencies , make sure your motherboard is also capable of running at these frequencies. Failure to meet these standards could result in an expensive upgrade not delivering the expected performance boost due to slower memory.
How to check processor compatibility with a motherboard
Engineering improvements to modern platforms have become more complex. To avoid returning a product to a store, it’s essential to use official information sources. The most reliable method is to consult the vendor’s documentation.
Find the CPU Support List on the manufacturer’s website
Each manufacturer (ASUS, Gigabyte, MSI, ASRock) maintains a specific list of supported models. Find your board model on the official website and open the ” Support ” or ” Service ” section, where you’ll find the ” CPU Support List ” tab. This lists all the processors that have been tested and are guaranteed to work on this board.
Restrictions on board revision
The board revision ( Rev. ) is the version of the board itself. Sometimes Rev. 1.0 doesn’t support a new CPU , while Rev. 2.0 with the same name does. This information is usually written in small print on the motherboard’s PCB in the lower left corner. Be careful: revision incompatibility is a common cause of a ” black screen ” on startup.
Updating BIOS/UEFI before upgrading your processor
Flashing the firmware interface is a critical step. Without the latest microcode, the motherboard will not be able to initialize the new central processing unit.
When is a BIOS update necessary?
If you’re upgrading to a new generation of processors within the same socket, upgrading is essential. The new code contains voltage and frequency instructions for the new cores. Without this, the upgrade will result in the system not displaying any image because it won’t understand how to manage the new chip’s power.
How to determine your current BIOS version
The easiest way is to enter the UEFI menu during boot (press Del or F2 ). You can also check the version in Windows using the System Information utility ( msinfo32 ). Write down the current version number and compare it with the one required in the support list for your chosen processor.
Safe BIOS Update: Step-by-Step Procedure
The update process requires caution. You’ll need a blank flash drive formatted in FAT32 . Download the update file only from the manufacturer’s official website. Many modern motherboards feature a BIOS Flashback feature that allows you to update the BIOS even without a processor installed, which is very convenient when buying a new board for a new chip.
- Download the required firmware file and unzip it to a flash drive.
- Restart your PC and enter the UEFI menu .
- Find an update utility (such as EZ Flash or M-Flash ).
- Select a file on the media and confirm the action.
- Wait until the process is complete without turning off the power supply.
Risks and common mistakes when flashing firmware
The main risk is a power outage during the flashing process. This could brick the board. Also, never use Windows update utilities, as any system error can interrupt the process. Use only the built-in BIOS tools for maximum safety. If the board doesn’t boot after flashing, try resetting the CMOS by removing the battery.
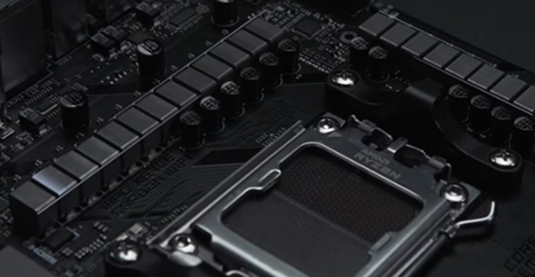
Motherboard CPU and VRM power supply
Many people forget that the processor consumes power through a special module called the voltage regulator module ( VRM ). In 2026, this has become even more important due to the high power consumption of powerful multi-core processors.
What is VRM and why is it critical?
The VRM converts 12 volts from the power supply into the low voltage required by the processor cores. If you’re installing a powerful Intel i9 or Ryzen 9 on a budget motherboard, the VRM may overheat. This will cause the system to throttle, and you won’t get the performance you expected.
Will the VRM be enough for the new processor?
Check the number of power phases on your board. If there are few of them and they don’t have heatsinks, the board isn’t designed for high-end CPUs.
A visual inspection is the best method: the presence of massive aluminum heatsinks around the socket indicates the board is ready for heavy loads. If you’re planning a major upgrade, choose motherboards with sufficient current capacity.
Signs of VRM overload and throttling
If the processor frequency drops sharply during gaming or rendering without any visible overheating of the chip itself, the power supply is most likely overheating. A VRM temperature above 100 degrees Celsius is a dangerous sign. This can lead to damage to the PCB and board failure. Use programs like HWInfo to monitor VRM temperatures .
Is additional cooling required for the VRM area?
If you feel like your power supply is barely sufficient, you can improve the situation. Directing airflow from a cooler or installing additional case fans will help reduce MOSFET temperatures. In 2026, cases with good airflow became essential for any powerful system, especially when partially upgrading older components.
Thermal limitations and cooling system
Thermal management is key to your PC’s longevity. Every new chip has its own thermal envelope, which must be effectively dissipated.
Processor TDP and real thermal packages
In 2026, TDP (thermal design power) became a rather arbitrary parameter. Actual power consumption under load can be twice the stated value. When choosing a cooler, always choose one with a reserve. If a processor is rated for 125W , look for a cooling system capable of dissipating at least 200W of heat.
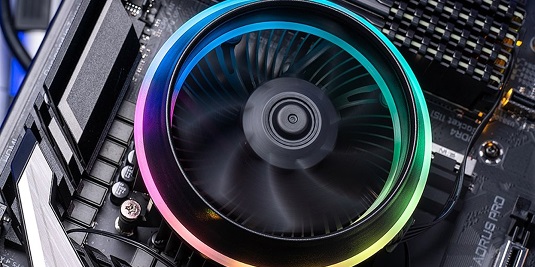
Cooler compatibility with the new CPU
Check that your old cooler’s mount fits the new socket. Manufacturers often produce adapter frames for new sockets. Also, make sure the cooler’s base completely covers the new processor’s lid—modern chips may have off-center dies, requiring even pressure.
Air or liquid cooling
For mid-range processors ( Ryzen 5/7 or Intel i5 ), a high-quality air cooler remains the best choice in terms of reliability. However, for flagship solutions, liquid cooling has become virtually standard in 2026. A liquid cooling system better handles the sudden temperature spikes typical of modern multi-core processors.
Temperature control after upgrade
Run a stress test immediately after installation. The idle temperature should be between 35-45°C , and under maximum load in Cinebench, it shouldn’t exceed 85-90°C for consistent operation. If the values are higher, check the cooler pressure and the quality of the thermal paste—these are the most common causes of overheating after replacement.
Replacing a CPU: A Quick Step-by-Step Guide
Once all checks are complete, you can begin the physical installation. Proceed with extreme caution, as the contacts in the socket are very easily damaged.
System preparation and backup
Before starting work, be sure to update the BIOS (as discussed above) and back up important data. Although replacing the CPU rarely corrupts files, it’s better to be safe than sorry. Unplug the computer and drain any residual power by holding the power button for a few seconds.
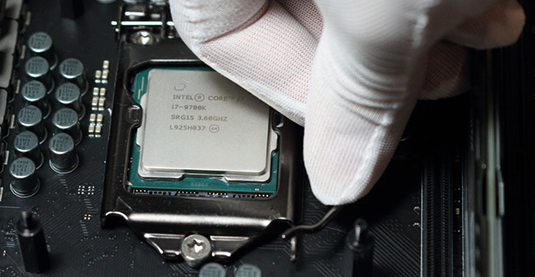
Installing the processor and cooling
Remove the old cooler and clean off any remaining thermal paste. Open the socket lock and carefully remove the old chip. When installing the new one, align the triangular key (mark) on the processor with the mark on the socket. The processor should fit into the socket without any force. Apply a thin layer of thermal paste and evenly tighten the cooler fasteners.
First boot and BIOS check
When you first turn on your PC, it may reboot several times —this is normal; the memory is being trained. Go to the BIOS and make sure the new processor is detected correctly and the temperature is normal. Check the RAM frequency, as it may be running at its default values after the reset.
What to do after replacing the processor
Physical installation is only half the battle. The software environment needs to be configured to ensure the new “heart” of the system functions correctly.
Do I need to reinstall Windows?
In 2026, Windows became much smarter. In most cases, reinstallation is not required; the system will automatically load the necessary drivers. However, if you’ve changed platforms (for example, from Intel to AMD ), a clean reinstallation of Windows is highly recommended for stability and to avoid conflicts with old libraries.
Stability testing and stress testing
Run stress testing. Cinebench is great for stressing all cores, allowing you to identify any errors. If the PC doesn’t reboot within 30 minutes and the temperatures are stable, the upgrade was successful. It’s also worth testing the system in demanding gaming scenarios, where the GPU and CPU load changes dynamically.
Performance and bottleneck testing
Use monitoring to see real improvements. If your favorite game previously used 100% CPU usage and now uses 50%, you’ve successfully eliminated the bottleneck. Your graphics card can now operate at full capacity, ensuring maximum comfort and responsiveness.
Common problems after a processor upgrade
Even experienced craftsmen sometimes make mistakes.
The main thing is to stay calm and act according to the algorithm.
PC won’t start after CPU replacement
If the fans are spinning but there’s no display, check that the RAM is securely installed and that the processor power supply ( 4/8-pin connector) is connected. Memory modules often get caught in the slots when installing a cooler, causing them to pop out. If everything is connected, try performing a factory reset by removing the battery on the motherboard.
Black screen and reboot loop
This is a clear sign of BIOS version incompatibility or memory issues. Try returning the old processor and rechecking the firmware version . If everything works with the old chip, then the new one is either not supported by the current firmware version or is defective.
CPU or VRM overheating
If the system shuts down after a few minutes of load, check the protective film on the cooler base (a common mistake among beginners). Also, make sure the water cooling pump is working. If the VRM is overheating , you may have chosen a processor that is too powerful for such a weak board, and the power supply cooling system will need to be improved.
Upgrading your processor for different tasks
In 2026, chip specialization became even more pronounced. Choosing a model should depend on your priorities in work and play.
CPU Upgrade for Gaming
For gamers, single-core performance and cache size (for example, AMD ‘s 3D V-Cache technology ) are important. In 2026 games, processors with a high core count are less efficient than chips with high clock rates and fast memory. Find a balance to avoid overpaying for extra cores that won’t be utilized by gaming.
CPU upgrade for performance and rendering
For professional rendering and video editing, core count is crucial. Upgrading to a multi-core CPU provides a linear speed boost. Graphics and video processing are efficiently parallelized, making the purchase of top-end Intel Core or Ryzen 9 models completely justified.
CPU Upgrade for Streaming and AI
Streaming and working with local neural networks require multitasking. In 2026, a neural network unit in a processor became an essential addition. If you plan to run complex neural networks directly on your PC , choose processors that support special instructions for AI acceleration. This will relieve the main system of load and make streaming smoother.
Summary: How to Safely Upgrade Your Processor in 2026
Upgrading a processor is a serious undertaking that requires attention to detail. The key to success lies in preparation. Always check official compatibility lists, don’t skimp on cooling and a power supply, and don’t forget to update the BIOS before installing a new chip.
- Always start by checking the Support List on the manufacturer’s website.
- Update BIOS in advance using an old processor.
- Keep an eye on the VRM status , especially on budget boards.
- Choose a cooling system with a TDP reserve.
- After installation , be sure to stress test your system.
A properly performed upgrade will allow you to enjoy the power of a modern computer for a long time to come, while saving you significantly on the cost of purchasing a new system. Safety and attention to detail are your best allies when upgrading your home PC.